
Caging

Caging is a tactic that uses your own buildings to restrict a chosen group of units to an area inside your base for a range of benefits. A simple technique that can win you a game if executed correctly and sabotage it if not.


The good
Caging properly allows you to have groups of units, away from the army, that serve as additional targets for enemy special buildings. With proper cages enemy vulcanoes, erasers, hexes and other nasty effects go from being extremely strong to a mild annoyance. Building cage walls early without filling cages can nulify the cost of building the walls and allow you to quickly respond to enemy specials. Certain races can further increase the survavibility of caged units or provide units that are very effective at defending your base from pushes when using a front cage.
The bad
Caging at a wrong time or without a reason can be actively detrimental to your team. When your team has buffing buildings, the caged units will take away buffs from your main army. Closing a cage and filling it with units is bad for ongoing pushes into enemy base. Every unit in a cage is a unit not reinforcing your army. Every building built to rush a cage is cost not spent on something useful. Caged hurt units will make healers for the main army leave the push and go heal the cage, possibly wasting all their mana. Your enemies will respond to your cages. With enough firepower your cages can be rendered dead and useless, meaning your army is vulnerable again so plan ahead when caging.
The ugly
The units are the core of caging in 2 very important ways.
First, what unit you cage inside. Early on cheap units can be good for caging. Later you want to cage tough units, ones with magic resistance or healing. In case of front cages, the units should additionaly be able to aid in defense. What you cage should be decided by races, both allied and enemy. Use the correct unit for the correct situation.
Secondly, it is extremely important to know which buildings to build and how to set flags for them. Early on, you will have to cage with regular buildings. Consider what type of unit they spawn, squishy casters should not be spawned in front. To void caging the wrong units you must set the spawn angle well (click the building and right click ground, might need a few tries). Syncing a new building resets spawn angle. Set the spawns so wall buildings are outside the cage, only allowing the correct unit inside.
Cage Types
Examples of the most common cages, the layouts are not set in stone and can be freely changed to fit your needs.
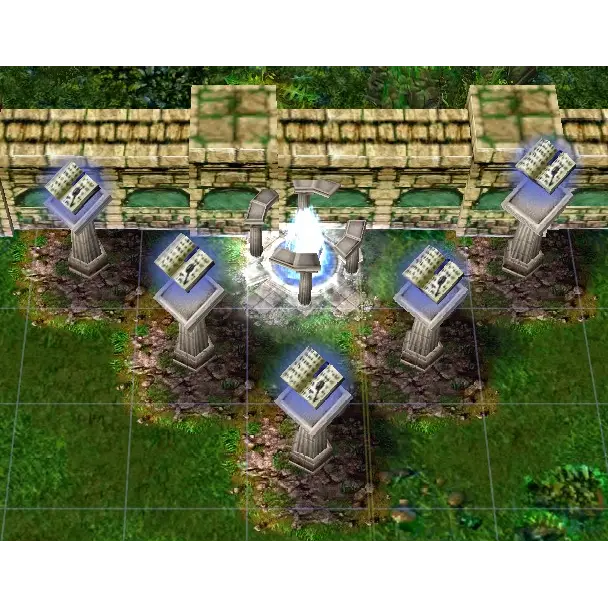
The corner cage
Small but efficient cage that requires at minimum 4 buildings. Useful to get a cage ready early. Can be filled with cheap units in a pinch.
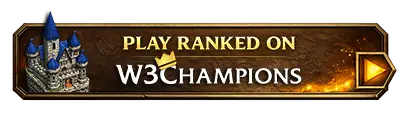
The front/castle cage
A front/castle cage is any cage that is supposed to aggro enemy army instead of the castle. Unlike most other protection buildings which are placed behind the castle for the castle to tank units and allow a comeback without using RS because a production building would die, this cage is built in front to take the hit first.
The 3x3 above the castle is just one very basic example. Small size and increased risk but unique utility. Use the caged units to assault enemies trying to attack your castle.
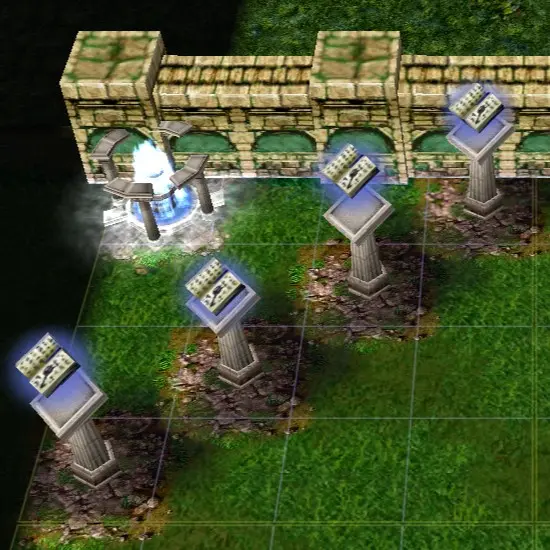
The side cage
A big cage that requires at least 7 buildings but can fit a lot of units. Typically built later than other cages, as it's more fit for later stages of the game
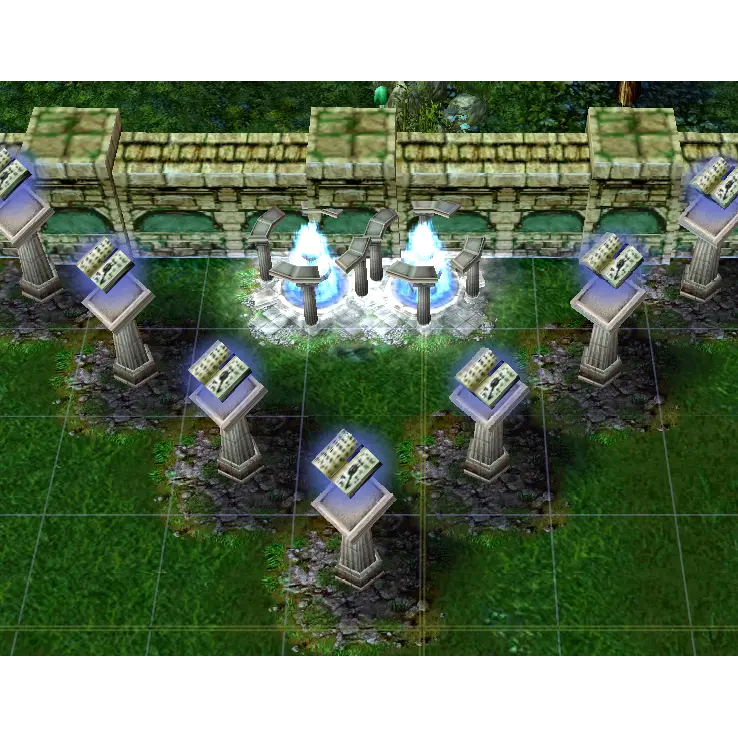
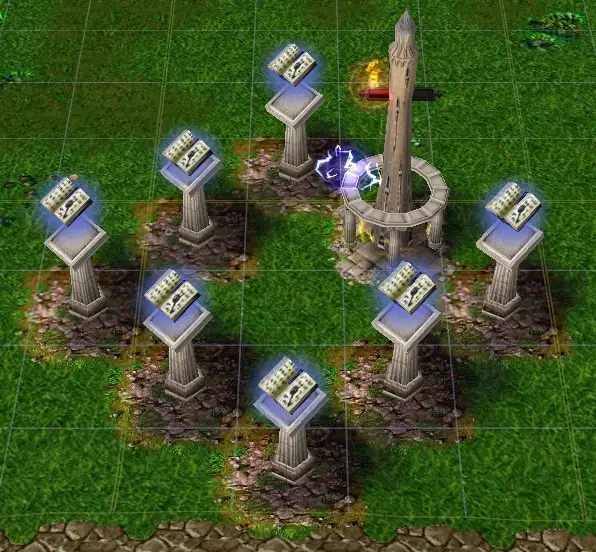
The "russian" cage
A smaller side cage, only needs 5 buildings but the capacity is very limited. Useful in a pinch.